Friday, May 31, 2013
Aqua Rain water filtration system
Wednesday, May 29, 2013
Tuesday, May 28, 2013
British Berkefeld® Gravity Water Filter with two 7" Super SterasylTM Ceramic Water Filter Elements from Berkey
Berkey is really a name it is possible to trust, and is readily acknowledged having been about for long times within the sector. We wanted to make British Berkefeld® Gravity Water Filter with two 7" Super SterasylTM Ceramic Water Filter Elements reachable for everyone at affordable costs, and with exceptional top quality. Our team technician has added some excellent touches in our new item, and that results in excellent value for you. Essentially you cannot go incorrect with our item as it has a confirmed track record of having excellent top quality merchandise at affordable pricing. We will by no means quit creating a much better notion to put together our very best outcome for every single home.

We now have an excellent feeling that in every single single application that we definitely have included in this most recent merchandise can make you please. We're able to give you using a realistic truth that we exclusively concentrate on all of the technique within the creating to make our item could be a fair item for a customer like you.
Making use of the very very best expertise of our manufacturing design crew and specialist professionals had been attempting to make an impression on all consumer by invest attention to every single single customer's require and mix with our outstanding method to produce British Berkefeld® Gravity Water Filter with two 7" Super SterasylTM Ceramic Water Filter Elements and It actually is contain the way forward for excellent living with technology fantastically together.

You Save : Check Cheap Price
Check Offer listing
For customers who do not have a reliable pressurised mainswater supply, whether it is at home, on a campsite, or in a holidaycottage, a gravity filter enables you to have clean filtered drinkingwater on tap. Water is poured manually into the upper chamber. Itpasses through the filter candles under pressure of gravity intothe lower chamber where the filtered water can be accessed via atap on the front of the filter.Made from high grade polished stainless steel, the SS GravityFilter is a portable, robust model, which is easy to keephygienically clean. The SS is very popular with aid organisationsand private customers alike.
Feature
- 3.5 Gallon holding Volume
- Height = 19.25" ; Diameter = 8.5"
- Purifies 3.5 Gallons / Hour
- High Grade 304 Stainless Steel
- 2 Ceramics good for 6000 Gallons
Monday, May 27, 2013
Infinity Edge Pools as well as their Cost
Infinity pools are also called disappearing edge or negative edge pools. They've a number of sides in which the pool edge terminates inside a weir that's 15 to 25 mm less than the median pool level. Water cascades within the weir right into a collection trough that runs along underneath the whole entire weir. The result when seen with a bather within the pool is extremely dramatic once the edge seems to merge with ocean without anyone's knowledge or perhaps the sky when the pool is situated high on a hillside.
A correctly designed infinity edge pool has two circulation systems. The infinity edge product is only made to run once the pool has been used and includes a circulatory that can take water in the collection trough, filters it and returns it towards the primary pool. Another system works in much the same way like a conventional pool, filtration and heating circulatory with the exception that the ugly conventional skimmers aren't needed and also the water moves back with the pump through the drain within the pool floor.
The extra price of an infinity edge pool arises mainly in the provision of:-
The gathering trough that functions like a buffer tank Water-proofing from the weir and also the collection trough The big capacity infinity edge circulation pump and filter The electronic autofill sensor within the collection trough
The automated level sensor / filling device is required to ensure there's enough water within the system to prime the advantage pump and also to make amends for any waves sent within the weir by bathers and rainwater. For any 12 x 6 metre pool with one infinity edge the extra cost ought to be within the eight to ten,000 Pounds range excluding any taxes. The trough and autofill, edge filtration and also the additional water proof costs will each add up to about 1 / 3 of the or about 3,000 Pounds each. Water-proofing may appear to become pricey but a regular factory made PVC lining isn't appropriate to have an infinity edge pool and must be changed with a PVC "lining armee" system which involves cutting and welding the PVC lining on-site.
There's a really interesting option to infinity edge pools that's starting to be offered in to the French pool market where Bluepools works. They are known as mirror pools and they're a thrilling option once the sights from the garden are under spectacular. Inside a mirror pool the infinity edge is taken round the entire perimeter from the pool and also the weir is drained with a perimeter trough that's much more compact compared to collection trough of the infinity pool. The perimeter trough is drained with a network of gravity given downpipes that go ahead and take water to some central collection tank that gives the buffer water storage normally supplied by the gathering trough inside a conventional infinity pool. The price of one pool will be more than to buy a infinity pool of the identical size using the infinity edge along one lengthy side.
The extra operating costs of either an infinity or mirror pool won't be that top since the large pump required to run the infinity edge system is only going to operate once the pool is being used. The additional costs is going to be incurred from:-
The energy the pump uses The price of water that's lost because of evaporation in the flow within the weir The price of changing the warmth loss triggered by evaporation The warmth needed for that water changing the evaporated water
The entire additional operating price is hard to assess precisely since it does rely on a lot of variables however it will definitely be under the price of heating a regular pool of the identical size utilizing a electric.
The introduction of infinity pools has coincided with the rise in a brand new trend towards designer pools which are now frequently seen at exclusive qualities as well as on magazine covers. Lots of people have property in a perfect place for installing an infinity edge pool much more have gardens that will take advantage of one pool and that i hope this short article encourages the introduction of both.
Copyright Bluepools SARL
world wide web.bluepools.com
Sunday, May 26, 2013
BRITA 3-Way Water Filtration Dispenser
Friday, May 24, 2013
DIY gravity water filtration for backpacking, camping, survival, emergency: MYOG Stitched bag
Thursday, May 23, 2013
The Optimum Cichlid Aquarium Setup
The groups of fishes commonly referred to as Cichlids, comprise a vast group of, generally larger and more aggressive fishes from Africa and South and Central America with a few species being found in Asia. They offer such a large variety of bright colors, shapes and habits that they have become one of the most popular fishes kept by hobbyist's world wide.
Such is the diversity of species, breeding habits and feeding that it becomes necessary to set up different groups of Cichlids in different tanks. Some of these include African Cichlids, American Cichlids, Dwarf Cichlids or Discus. It is usually recommended that you keep these like minded fishes together and don't mix them in general.
Selecting and Positioning Your Tank
Always try to choose a tank with the largest possible surface area and volume as most cichlids grow quite large. Make sure you always have a glass cover to stop your fish jumping out.
Position your new aquarium so that you avoid direct sunlight hitting the aquarium for too long as this can cause excessive algae problems.
Choosing Gravel, Decor and Setting Up
Cichlids are quite territorial and the more holes, refuges and interesting "zones" you can create make for a much harmonized community.
A good starting point is to place in your tank a background that can offer the realism and natural environment that these fish will feel very relaxed and unstressed in. Check out the cichlid mansion range from Aquarium + Reptile Rocks Inc if you want something extraordinary.
Next is the gravel we advise a fine blended gravel as too coarse a gravel size allows uneaten food and waste to accumulate in the pockets between pebbles away from water flow that break it down. There are several varieties to choose from. Clean your gravel in small quantities in a bucket. Three or four rinses should be sufficient. Place the cleaned gravel into your tank along with a little water.
Next to add some more "zones" you can add cleaned rocks and driftwood and position them. Triangulate your decorations to create a greater depth of field and provide an amphitheatre where the fish can congregate in a community setting. Try to slope your gravel slightly towards the rear and sides using rocks and logs to create tiers and depth. The lightweight rocks from A+RR Inc like quartz rocks, north head ridge, barnacle, rock pool and charred wood make this fun and easy to do. When you have the major decorations in place, add a little water, if this is a little dirty from the gravel siphon this dirty water out again into your bucket.
Next fill your tank. Avoid disturbing the gravel by using a plate or newspaper onto which you can direct the water flow. Some coral sand is a good addition to an African tank, while white Rift Lake Sand looks great for Africans also but can show up detritus badly. These aspects will be discussed further later.
Preparing your Tap Water
Next we must treat our tap water to remove harmful chlorine and ammonia. There are several products that will remove both, the best value is Amquel Instant water Detoxifier.
It is also necessary to replace electrolytes like, magnesium, and potassium making in tap water.
The electrolytic aquarium salts are essential to fishes well being. Not only provide an anti-bacterial effect, but help fishes produce body slime to protect themselves from infection and create an essential osmotic barrier so they do not dehydrate. Make sure it is dissolved before adding to your aquarium.
There are also several products we can use to specific water conditions for African and Discus. To calculate water volume: consider 10cm x 10cm x 10cm = 1 liter. So length (cm) x Width (cm) x Height (cm) divided by 1000 = Volume (liters).
Biological Filter Supplementation
The Best way to get crystal clear water is to pro-actively provide bacteria cultures as biological filter supplement. In our opinion WASTE CONTROL and CYCLE used in conjunction with one another or HBH TERMINITE are the best way to enhance your filtration and stay ahead of the game. People using these products simply do not encounter the same problems as people who take a minimalist approach (don't use a filter supplement) and end up constantly reacting to problems. These bacteria cultures help convert all organic wastes to ammonia then further to nitrite and finally to nitrate. To establish your tanks bacteria populations can take several weeks but is accelerated greatly by adding supplements. Do not overstock your new aquarium during this run in period.
Filtration
All good filters provide ample filter media surface areas for the colonization of aerobic (oxygen breathing) denitrifying bacteria which break down fish waste. The greater the volume of the filter and the greater the flow rate, the bigger the population of bacteria to keep your tank clean. This is Biological filtration. All good filters should provide some sponge as Mechanical filtration. Chemical filtration is also important. We always use ammonia remover as a safeguard. Carbon is also beneficial but Purigen is superior. It is rechargeable and will also remove log stains from your tank (That is if you did not use the Charred wood from A+RR Inc). Remember to rinse loose particles out before adding to your filter.
Filter Types
Freshwater Trickle filters offer the most filtration for large seriously stocked tanks.
External Canister filers like the PRIME, EHEIM, FLUVAL or VIA AQUA are the best of the commercially available filters. They offer the largest volume of media and can be concealed from view. All these brands have a simple priming system and excellent taps to isolate water in the tubing while the filter is cleaned.
Hang On styles like the AQUACLEAR and AQUAONE are also very good. They possibly provide the best value if your budget does not permit an external canister. Simple fill the filter box with water and turn on. Water is pumped through the filter and gravity flows back into your tank.
Internal motorized filters like the CRYSTAL , RIO , and EIHEM are popular for smaller tanks or as a secondary filter for extra circulation in a large tank. Internals usually do not interfere with top glass or hoods. These can be placed under one of your lightweight rocks.
Air Operated filtration is often not sufficient for cichlids. We do highly recommend air bubbling in Cichlid tanks. Be sure to use a Check Valve so that water cannot flow back into your pump if power goes off.
If you have a Cichlid Mansions or Amazon background from A+RR Inc you can conceal a lot of the plumbing from view which makes for a very attractive set up.
Water Changing
Although nitrate (residual waste) is relatively harmless, the levels will accumulate and become dangerous if regular partial water changes are not performed to dilute nitrates. Cichlids are large fish that eat a lot, so nitrates accumulate quickly. PH is also pulled dangerously lower by organic waste accumulation. Therefore, no matter how good your filtration is, you still must water change regularly. We recommend a 1/3 - ½ water change fortnightly to keep pH above neutral and nitrates low.
The best tool to assist you with water changes is a Lee's Gravel Vacuum. They allow you to remove the dirtiestwater from around the gravel and replace it with clean, treated tap water. This task is easier to do and a better job done if you have lightweight rocks and décor. We recommend you test pH and nitrate weekly to ensure your water changing maintenance is sufficient to maintain this balance. PH can be maintained using PH UP, but the only easy way to remove nitrate is by water changing.
An important tip when changing. Rinse your filter media in your old aquarium water rather than under a tap as the chlorine in tap water will kill off the precious filter bacteria living in the foam and other media. If you follow these procedures you should never have to completely break your tank down to clean it out.
Heating
If you want to keep Cichlids you will need to heat them. A good guide is approximately 1 watt of heating per liter of water. A higher wattage heater than necessary is often a good choice though because they can be used on larger aquariums. Position your heater in a back corner at a 45 degree angle so that heat does not rise directly onto the thermostat. Make sure that there is good water movement around the heater to ensure that the element is heating. Large cichlids can get quite boisterous, so a heater guard will stop your heater being broken. We believe it necessary to also install a thermostat to check the heater. The stick on types are the best in our opinion as the suction cup type soon do not stick and require replacement.
Lighting
Lighting is necessary to view your fish at night time. To achieve this we find it better to illuminate your tank from afternoon until bed time when people can more easily enjoy their tanks. Lighting left on all day will undoubtedly cause excessive algae problems. For best results with plants we recommend high intensity full spectrum white lighting. We like to use Aquastars, Arcadia 's or Power Glo's.
The African Cichlid Tank
The African Rift lake Cichlids from Lakes Malaqi, Tanganyika and Victoria have become a popular variety of fish for people who desire dramatic color, size and movement in their tanks. African cichlids are quite aggressive and fast moving and should be kept in tanks set up for a community of African cichlids.
Natural Habitat
African Cichlids inhabit the rocky shorelines of the rift lakes of Africa . The water in these lakes is quite hard and alkaline. Large schools of fish graze algae from the rocky outcrop reefs. Amongst the algae live small crustaceans which also constitute part of the diet of African cichlids.
The bottom of the lakes is sandy. Innumerable caves formed between the boulders offer protection to young fish and brooding females. Check out the Cichlid mansion and Amazon range of backgrounds if you want realism and something special. Most species from Lake Malawi are mouth brooders and constitute a large proportion of the species available in the hobby. A lot of the Tanganyikan species form lifetime pair bonds and protect their young, while others are also mouth brooders.
Rift Lake Water Conditioning
To recreate the hard alkaline water required by these fish, shell grit or coral sand should be added to your gravel or used exclusively for the bottom. African Rift lake sand is also becoming popular, but can show up detritus badly. Good quality African Cichlid water conditioners like the Seachem Rift Lake Salt and Buffers are a real advantage in creating the right water conditions.
There are several products that will remove both chlorine and ammonia, but the best value is....Amquel Instant water Detoxifier.
Setting up African Rift Lake Cichlids
As African cichlids come from rocky shoreline areas of the lakes, we suggest that intricate rockwork form the basis of your set-up arranged to form area's with numerous caves. The rockwork should be predominantly built up around the back and sides to leave a communal amphitheatre where all the interaction and displays take place. A+RR Inc has a large range of rocks which are extremely attractive and offer plenty of hiding places. Plants are not essential to your African community tank because African Cichlids, being omnivorous, will eat your plants except for something such as Anubias. One option here is to cut some holes in barnacle rock which allows the greenery to be seen but protects the base in the gravel from the fish. Plastic plants instead make a good addition.
Adding African Rift Lake Cichlids
Try to crowd your African cichlids without taxing your filtration and water change management. This stops individuals from becoming too dominant and harassing others.
We find it best to start with small to medium sizes of fishes of several species in groups of four.
(4 Electric Blue, 4 Electric Yellows, 4 Venustus, 4 Red Empress)
Of the Lake Malawi fishes, the most common species are Zebras, Pindani, Lombardoi and others. People often start with these species as they are cheaper and show color while still young. Many hobbyists progress to the slightly more expensive and spectacular 'Haplochromis' group, like Electric Blues, Red Empress and the Peacocks where only the males exhibit the most amazing color as they mature. In general Take Tanganyika fishes are a bit more expensive and comprise some of the most sought after species like Frontosa, "Lanprologus" and Trheus.
Feeding Africans
Feeding African Cichlids the right type of foods is very important. African Cichlids have extremely long intestinal tracts, like omnivores, which means that foods (meat, worms etc.) will take a long time to digest. Inappropriate foods will rot in their stomachs causing bloating, sickness and sometimes death. For this reason foods with a large proportion of spirulina and vegetables are best. Our favourites, HBH VEGE or Cichlid Flakes and Pellets are perfect. Super Bits are also eagerly taken but we do not like to feed Super Bits exclusively, but rather combined with Spirulina based foods. Frozen bloodworm and brine shrimp are also good for most species, but meats and live blackworm are definitely no-no's.
The American Cichlid Tank
American Cichlids are larger growing and slower moving than their African cousins. They are also far more predatory and are happy with a higher protein than Africans. For these reasons we do not recommend keeping American and African Cichlids together. Of course there is always the odd exception.
Natural Habitat
The natural habitat of the Central and South American cichlids is quite different to that of Africans. Logs and branches in general replace rocky outcrops still having a background that can provide safe secure retreats are important. We feel darker gravel such as the Red Gravel blend suits the reflective colors of Americans, compared to lighter substrates spawners who will form a pair bond. Spawns can produce hundreds of fry, the parents will try to protect and nurture their babies instinctively. It is not uncommon for pairs of fish to spawn in the community tank, although it is unlikely that the parents will be able to protect babies from the hordes. Most American cichlids have also been in the hobby for a lot longer than Africans. Species like Oscars and Red Devils have become household names.
Water Conditioning
American Cichlids are quite tolerant of water conditions, but a pH close to neutral and low nitrates (regular water changes) provide a comfortable environment. Always treat new tap water well with XXXXXX and XXXXX as with all fish.
Setting Up for American Cichlids
Use plenty of logs. Submerge some rocks into the substrate and add more structure on top... Do not be concerned by excessive color from new logs as this will become less with regular water changing. You could use charred wood from A+RR Inc here as well. Plastic plants attached to small crevice rock will provide a splash of color. Of course you can use one of the Amazon or Cichlid mansion backgrounds that will create a stunning base for you to expand on.
Adding American Cichlids
Try to set up a large variety of young fish to grow up together. That way you will have far more compatible large fish when they grow up. Our favourite species are Oscars, Red Devils, Texas , Firemouths, Severums etc. Give them plenty of room to grow. Often people will ask, "What can I put with my large Oscar who has lived alone for a year?" if you put another single fish in, there is every chance that the new inhabitant will be killed. We advised it is better to trade in large fish and start with a community of smaller Americans.
Feeding Americans
American cichlids will consume a large variety of foods. HBH make a range of American specific cichlid foods. Advance the size of the pellets as your young fish grow. A wide variety of frozen foods are recommended in conjunction with live foods including feeder fish. Only offer feeder fish as a treat, otherwise they will become fussy about accepting prepared foods.
Dwarf Cichlids
The most popular dwarf cichlids are the Apistogrammas and Microgeophagus (Rams) from South America and the Pelvicachromis (Kribensis) from the Congo River system of Africa . These dwarf cichlids are popular community fish that may spawn in a community tank and exercise parental care over their young if there is enough cover. They prefer a good varied diet of prepared frozen and live foods.
Discus
Discuses are a popular group of cichlids kept by enthusiasts all over the world. Many claim Discus are the "King of Fishes". Discus are definitely a fish that require some experience, although they may be kept in a community tank. The major requirement to keeping Discus well is good water management and the best foods. Discuses seem to metabolize quickly and need to be fed often with high quality prepared and frozen foods. The best are Tetra Bits with daily frozen food like Beef Heart and Liver and Discus Dinner. Once Discus are feeding well they are competitive and hardy.
Discus are usually happy in low nitrate water with pH slightly acidic and soft water which is very warm 29-32 Degrees Celsius. For breeding Discus, the fish need to be well conditioned on the best foods. The best range of water conditioners for Discus are the Seachem range of Discus Buffers.
The major problem with Discus is their susceptibility to parasites like gill flakes as well as intestinal worms and flagellates. We advise regular treatments for parasites with General Cure or Worm-Rid, especially after Discus are newly purchased or moved. Intestinal worms are best treated with Worm-Rid and flagellates with Octozin. An inexpensive, yet very good book is the Barron's Discus Fishes.
Enjoy setting up your tank and we love receiving your pictures of the products from A+RR Inc (Aquarium + Reptile Rocks Inc).
Wednesday, May 22, 2013
BIBO Water Filtration Simple Installation
Tuesday, May 21, 2013
Proper Land Drainage is essential!
Many property owners are not concerned with yard drainage until they have a problem. Water naturally follows the path of least resistance to lower elevations and problems arise when original pathways constructed by the builder become blocked or were inadequate from the beginning. Not having suitable slopes and drains on a property to direct or divert water runoff can allow the water to find a path directly to areas where you would least want it such as foundations, under pavement, in your basement etc. Flooding basements and cracked foundations are good wake-up calls to the issue but addressing problems beforehand can save you thousands of dollars, and headaches, down the road.
The two categories of water supplying a lawn are surface and subsurface. Subsurface water refers to the water below the first layer of topsoil which cannot permeate any lower due to the tightness of the soil beneath. Also known as the water table, all soil has this layer of water with differences in depth depending on the area. Although a high water table can be a problem in some areas, in general, surface water is the cause of excess subsurface water as too much surface water penetrating the ground can raise the water table. Surface water sources are rainfall and irrigation, such as sprinklers, and can be particularly troublesome in urbanized areas which contain numerous impervious surfaces.
Streets, driveways and parking lots simply leave nowhere for rainwater to go. As with a lawn, the runoff will either pool in depressions or flow to soil around the edges causing saturation in another area. When soil reaches 100% saturation, with little or no drainage to assist in excess water removal, not only do pools of water collect, but the saturated soil takes much longer to dry out. This excess water retards plant growth by decreasing aeration in the root zone and decreasing nutrient supplies. Additionally, excess water in the soil will increase freezing damage in the winter months. Having proper drainage on your property will prevent water from collecting around your building or home foundations, minimize soil erosion and help protect your vegetation from death and disease.
Surface and subsurface are the two types of drainage solutions and both are vital protections for buildings and lawns. Surface drainage refers to the natural pathway taken by the water following rain or irrigation and is achieved through gutters, downspouts, surface grates, exposed French drains and by shaping and grading your lawn to provide maximum surface water removal with minimum soil erosion. Subsurface drainage refers to pipes and drains placed in the lawn which remove excess water that has gravitated underground, either through holes in the soil or simply from soil saturation. Water travels through soil by capillary action, which is much like a paper towel - when one side gets wet, moisture will slowly travel to the dry side until the entire substance is saturated. Once the soil is saturated, subsurface French drains are needed to remove excess water. In doing so, subsurface drainage keeps plants healthy, helps soil to warm earlier in the spring and leaves less water to freeze in the winter, minimizing frost heaving damage to your home or building.
Problems associated with improper drainage
Improper drainage can lead to pools of collected water in your lawn and/or around your home or building, both of which pose a threat. When collected close to your foundation, standing water can potentially cause foundation cracks, foundation movement and flooded basements. When collected on your yard, pooling water gives mosquitoes a breeding ground and can leave your grass susceptible to disease.
Foundations: The most costly issue associated with improper drainage is your foundation. Soil naturally expands when it is wet and contracts when it is dry and as long as all the soil underneath your building expands and contracts uniformly, it is not likely to cause a problem. Damage is done, however, when only part of the soil heaves or settles. This differential movement is most often due to differences in soil moisture. Improper drainage on one side of the building can leave wet soil that remains waterlogged for days or weeks (or in worst cases leaves constant water pooled around your foundation walls) while the other side of the structure has soil that dries quickly following a rain.
The wet side has expanded, and remains so, while the other side contracts as it dries, and this action pulls the walls of the structure away from one another. Repetition of this process will eventually produce cracks in the foundations, walls and/or ceilings. Foundation repairs are not usually covered by homeowner's insurance policies and can cost as much as ,000 to ,000 or more to fix, not including cosmetic fixes to drywall, door jams, bricks, flooded carpets, flooring, etc. Anyone who has experienced a flooded basement or cracks due to heaving can attest to a costly fix! In addition, the drainage issues which caused the problem will still need to be addressed.
Basements: The same issue associated with foundations applies to your basement, with the added problem of letting water into your home through the cracks. In addition to damaging carpets, flooring, drywall and furniture, the water increases your basement's humidity creating the perfect environment for the growth of bacteria and mold. Mold enters your home as tiny spores, which need moisture to grow and multiply. They can grow on almost any surface and they digest and destroy your home as they do. When disturbed, mold spores are released into the air and can be breathed in by you and your family, aggravating allergies and asthma. A small number of molds produce mycotoxins which can induce nausea, fatigue, headaches and lung and eye irritation when a person is exposed to high levels. Furthermore, mites and spiders can proliferate in a moldy basement as mites feed on mold spores and spiders feed on mites.
Waterproofing your basement can help protect your home and is a good insurance policy, but your first line of defense against a wet basement is improving the drainage in the lawn and all areas surrounding the home or building. According to most engineers and home inspectors, 85 to 95% of wet basements and interiors of buildings can be made dry by improving exterior drainage around your house or building.
Mosquitoes: We are all familiar with one of the biggest nuisances of the summer but were you aware that mosquitoes need less than an ounce of water in which to lay their eggs? While standing water is generally the egg-laying site for mosquitoes, some species lay their eggs on damp soil and, if your lawn has poor drainage, leaves your grass as a perfect home for these pests. Needing only two to three days to hatch, your property needs to be able to dry out quickly enough either to prevent females from seeing your yard as a prime location or to dry out eggs that have been laid.
With females laying up to 300 eggs at a time, your yard can easily become infested, driving you and your family inside on warm summer nights. Along with the itching and aggravation of bites, mosquitoes bring diseases such as West Nile Virus, Malaria, Dengue and encephalitis. All are potentially fatal. Your pets are also at risk, as mosquitoes are the hosts for heartworm and can communicate this disease to dogs, cats and other animals. Additionally, West Nile and encephalitis can be transmitted to horses. The American Mosquito Control Association instructs property owners to not only eliminate standing water around your home or building, but to ensure proper drainage on your property to eliminate this potential hazard.
Turf Diseases: As the first impression a visitor or customer has of your home or business, it is no doubt important to you to have well-maintained and inviting landscaping around your property. Death and disease of grass and plants is not only ugly, it is a waste of money invested as well as expensive to correct. Excess water on or in your lawn prohibits the growth of grass, plants and trees by robbing them of their air and nutrient supply and leaving them susceptible to attack by fungi, moss and mold. Fungi, the most common cause of lawn diseases, are microscopic organisms that spread by air- or water-borne spores. The spores act like seeds, sprouting to life and infecting its environment when conditions are right.
Rhizoctonia Yellow Patch, Red Thread, and Pythium Blight are some common fungi diseases which appear in moist environments resulting from extreme soil and surface moisture. Many of the fungi diseases are difficult to control once they appear and damage may remain for two to four years following treatment. While fungicides can be applied to help prevent or control lawn diseases, several strains are resistant to fungicides. The best prevention is the absence of favorable conditions, including improving moisture conditions on top of, and under, your turf.
Mushrooms also need extreme wet conditions to grow. While mushrooms do not harm grass, many of them are poisonous and can be a danger to children and pets that ingest them. Poisonous mushrooms have no features to distinguish them from nonpoisonous mushrooms and identification, therefore, is only possible by those educated about the various genera and species.
Erosion: In addition to the issues associated with standing water, water moving too quickly off your property causes problems as well. As raindrops fall on your lawn, if there is sufficient intensity, the impact will dislodge small particles of soil which can then be carried off by the rain as it flows. This soil will either be carried off to sewers or deposited in another area of your yard, depending on your drainage conditions. Over time, original drainage measures, such as ditches and trenches, can become filled with soil, defeating their purpose and redirecting how water moves on your property. Erosion is accelerated where plant cover is sparse and spaces between plants become larger, leaving no protection for your soil during intense rains. Proper grades and slopes stop water from carrying away your soil by keeping water runoff at an acceptable rate. Slowing down water that is running off too quickly gives soil particles time to settle out of the water and back onto the ground before being transported too far away. Additionally, healthy plant life with deep roots protects and holds on to your soil.
Benefits of proper drainage
Structural Protection: Having a comprehensive drainage system in place protects your structure by preventing water's damaging contact with concrete. Water that doesn't evaporate and isn't absorbed by soil eventually goes somewhere and, oftentimes, it sits under and around your foundations. Drainage solutions will keep the moisture content around your foundation stable and uniform, keeping contraction and expansion to a minimum. This maintains the integrity of foundations and helps prevent cracks and water seepage.
Plants and Landscaping: Proper soil moisture is essential for plants and lawns to establish a healthy root system. Removal of excess water in the soil deepens the root zone and increases the air in that area. The increased aeration, in turn, increases the supply of nutrients, many of which need the air to convert chemically before they are accessible to plants. The deep root system which grows will then holds on to the soil and protect it from erosion. Additionally, water will not pool in areas of your property, leaving turf susceptible to disease, and help you maintain the pleasing aesthetics in which you invested.
Recreational Areas: By implementing drainage solutions, recreational areas, such as parks, golf courses and athletic fields, improve traffic ability and increased use of the property. Drains help nature clear out excess water and allow turf to quickly recover from rain. The result is that the recreational area can be open for extended periods of time and for more intensive use, resulting in increased revenue.
Spring showers are not the only cause for concern
The Midwest is notorious for extreme weather changes with a drought one year and floods the next. While St. Louis has an average rainfall around 40 inches, in 2008 we had 50.72 inches pour down on us, with nearly half of that amount coming between June and September. If you have weathered winter snow and spring rains, do not let down your guard thinking you are safe for another year. Summer can sometimes bring surprises and the added deluge to your soil will only intensify existing problems requiring more extensive repairs.
A note about water tables
Water table refers to the depth at which the soil always contains 100% water. In some areas the water table is higher than the bottom of the foundation, requiring a complex system of drains and sump pumps to draw the water away from your structure. High water tables can lead to devastating damage to your foundation or basement and is sometimes cited by professional waterproofers as the cause of a problem because of the expensive measures to correct it. The National Association of Home Builders, however, estimates that only five percent of wet basements are due to high water tables. If you have water damage, you are most likely dealing with surface runoff problems which can be corrected through slopes, grades and drains in your yard, along with proper gutter systems. Modern building codes prevent contractors from building basements where water tables are high and if your home or building is less than 30 years old you can be reasonably sure a high water table is not your problem. If you have a wet basement, be aware of this issue! Inform yourself by contacting your local building inspector and getting information about your local water table.
Do you have drainage problems?
Try this experiment: dig a hole one foot across and two feet deep and fill it completely with water during a dry spell. If the hole drains completely in less than five minutes or in more than 15 minutes, you have a problem. A more simple way to spot problems is to look at your lawn during and following a rain. If you have water flowing quickly across the yard removing topsoil during a rain or pools of water on driveways, parking lots or lawns following rain, then you have a problem. Other indicators include yellowing plants, yellowing or thin turf although it receives plenty of sunlight and has no obvious disease, fungus or mold on the lawn, stagnate water smell and water seeping through door sills, basements and garages.
Types of drainage solutions
A comprehensive drainage system will include surface and subsurface drain solutions. Surface drains remove the large amounts of water that fall in short periods of time and subsurface drains remove the excess water absorbed into the soil. The two systems work in conjunction to maintain the moisture in your soil at the proper level for protection of your landscaping and your home or building.
Gutters: Your first line of defense against foundation flooding is your gutters! During a moderate rainfall, the average sized roof sheds 160 gallons of water runoff per hour. To prevent the runoff from being deposited on the ground next to your foundation, a proper gutter system is essential. Not only is the correct gutter size for your roof area a consideration, but an insufficient number of downspouts is equivalent to having no gutter system at all. Downspouts are needed to handle the volume of runoff your roof will collect and splash blocks must be utilized to direct the runoff away from your home or building and out to your drain system. A better solution to splash blocks, however, is to install PVC piping to the end of the downspouts to remove the water 6-10 feet or more away from your home or building. Furthermore, gutters must be properly maintained to prevent clogs and gutter joints must be inspected for leaks. Having a suitable, effective gutter system should be the first step in your drainage solution.
Grades: To protect structures, the most important grades on your property are those within 10 feet of your foundation or basement. This will prevent the water you just diverted away from the structure from soaking back through the soil toward your structure. Suitable grades vary depending on who you consult but a safe measurement is a 1 inch (or more) drop for every 1 foot out for the first 10 feet. This results in at least a 10 inch slope for the 10 feet closest to your foundation walls. The rest of your yard should contain a continuous slope downward to keep the water moving away from your foundation.
Surface Drains: Surface drainage can be defined as the controlled removal of water that collects on the land from rainfall, irrigation, snowmelt or hillside seeps. As gravity is the primary force driving this type of system, it involves shaping the land with a continuous fall in the ground level to provide a downhill passage for surface runoff at an appropriate rate of flow. For grass drainage channels, or swales, a minimum slope of 1% to 5% is desired. The contours of the land then direct the runoff to a suitable collection site, such as ditches, basins or storm sewers. At the low point of the ditch or interception point, area drains are installed which are connected to a main or submain and prevents the water from pooling in your yard. The underground pipes need a minimum slope of 1% or 1/8 inch per foot to keep water moving through them. If the ditch is long, several smaller drains should be spaced in a series, rather than one large drain in the middle, to help prevent erosion.
For driveways and other hardscapes, channel drains and exposed French drains are ideal. These linear trenches collect sheets of water that run off, as concrete and asphalt absorb none of the water as it falls. The open area of the channel/ exposed French drain is much greater than an area drain and is better suited to the greater volume of rain it will need to collect. Additionally, channel drains allow designers to modestly slope hardscapes, rather than requiring numerous, extreme slopes to direct runoff to area drains.
Subsurface Drains: While the benefits of subsurface drainage are hard to see because they occur within the soil, the difference will be noticeable in your plants, grass and soil. Subsurface drainage is the removal of gravitational water from the soil, which is accomplished by placing French drains underground to collect and remove water to a drainage outlet. Subsurface drains do not remove water necessary for plants, only excess water, which flows to the drains by gravity. Sub-Surface French drains consist excavating a sizable trench and lining it with a filter or geotextile fabric, which helps prevent soil particles from entering the French drain. The trench is then filled with clean rock/gravel and a proper sized perforated PVC pipe for the application is placed in the gravel.
Once the trench is filled with grave, it will be covered with a layer a permeable filter fabric, installing a mixture of high quality topsoil/ sand and lastly installing new sod on top (assuming this French drain will be located in a grassy area). French drains function when water in the soil enters the gravel bed, flows into the perforated pipe and travels through connecting solid pipes to a discharge point. A general guideline for placing French drains is to use 4 - 6 inch perforated pipes, bury them 18 to 36 inches deep and space them 15 to 20 feet apart. In the trenches, pipes must maintain a .1% to a 1% slope. Soil construct, acreage and turf usage, however, may require variation from these guidelines and a professional can help you determine the best solution for your situation.
Discharge Outlets: Once water is collected in the pipes, it must be diverted to a suitable outlet to be released. This outlet can be a street gutter, a storm sewer or an onsite pond. Using a pop-up drainage emitter, water can be diverted to a water-safe area on your property away from your home or building. Pop-up drainage emitters are opened by the hydrostatic pressure of water flowing through the drain pipe, releasing water collected from gutters, downspouts, basins, grates, etc. If placed close to the street, the released water can flow over the curb and into the street without having to drill through the curb. The emitters then close as water flow diminishes, preventing debris and animals from entering the end of the pipe and clogging the system. Property owner or maintenance personnel need to make sure they perform routine maintenance on the pop-up emitters. This can be done by removing the pop-up to make sure there is no debris washed down from the roof gutters or surface drains that could potentially slow down the water flow in a heavy rainfall event.
Cleanout Connections: It is a good idea to install cleanout connections on all drainage systems integrated into your property. This is commonly overlooked until pipes need to be accessed by cameras or cleaning equipment years after the initial installation. Access points are needed for the following three reasons. 1) Routine maintenance, and especially if routine maintenance is neglected because the contractor will have to access the pipe to unclog them for a fee of course. 2) If the systems functionality has declined. 3) If damage has occurred to the drainage system pipes from heavy equipment or excavation during an on-site construction project. Although cleanouts add cost to your project, it is highly recommended to have cleanouts installed on all downspout connections, all French drain systems and all long mainline pipe runs over 80' without drain grates in which you can access.
Before contracting to have you project installed, make sure cleanouts are integrated into your drainage system. It has been calculated that the cost to cut into a pipe and then patch it because there are no cleanouts will be a minimum of twice the cost as having them installed in the first place. Sometimes it is 5-10 times as much when access is needed to an existing French drain without cleanout connections. So don't gamble because when you're installing a system with materials that last decades, you undoubtedly will need access; if for nothing else, routine maintenance. A professional drainage contractor should be able to help you determine the best cleanout points for the system their proposing for your property.
Finding & Hiring a qualified drainage contractor
Doing your homework on potential drainage installers is important. You need to be assured that your contractor is insured and has the skills needed to properly install your systems. Be wary of "special deals" or the "great deal from a friend of a friend" - these will most likely cost you more dollars and headaches in the long run.
Tools for Locating a Potential Drainage Contractor: The Better Business Bureau is a great starting point in your search for a contractor. They maintain an online directory for BBB-accredited businesses in your area. You can check not only how long a contractor has been in business, but also any complaints filed about their operation. Angie's List is another great tool for recommendations, as you can get testimonials from actual customers. Even if you "hear of a guy from a friend," check their references online. See what other people's experiences have been and choose a pool of potential contractors from the best you can find.
Portfolio and References: After you have a list of potential people for the job, ask to see a portfolio of their previous jobs and whether you can see former worksites. If possible, see their handiwork in person, perhaps driving by a home or business during or after a rain. This will help you not only to understand their drainage plans for your property, but to assure you they can indeed get the job done right. If you can speak with former customers, ask if they were satisfied with the work, whether the contractor stayed within budget and if the project was completed in a timely manner. You need to look for the best person for the job, not the lowest bid. You want the problem to be fixed upon project completion; you do not want to be dealing with drainage problems or, in worst case scenarios, legal problems, long after the contractor has left.
Bids: Get at least two bids for your specific job and get them in writing. Furthermore, make sure you understand the difference between the bids. Higher bids do not always mean a contractor is trying to get more money into his pocket. Better materials, more skilled workmanship and better reliability may be worth a slightly higher price. Keep in mind that, usually, you "get what you pay for."
Insurance: An important issue when hiring a contractor is his insurance. If your contractor does not carry general liability insurance or worker's compensation, the property owner can held responsible for any accidents which occur while work is being done. To protect yourself, ask for proof of insurance. Reputable contractors will understand that you are doing your research and will not be offended. Be wary of any that try to convince you this is unnecessary - they may have something to hide.
Skills Needed: Make sure potential contractors have the skills needed to do your job. Is your contractor a drainage specialist or merely a landscaper who has dabbled in drainage installation? Can he utilize a transit to analyze your slopes if needed? Does he know the proper depths and spacing for pipe placement in your yard? Most importantly, is he diverting your excess water to a suitable outlet? Purposefully diverting water to a neighbor's yard, when runoff didn't already naturally flow to that yard, can result in huge fines. As the property owner, you will be held responsible for your contractor's end result.
Equipment, Supervision & Project Site Management: Find out who will supervise the work and how often will they be onsite to see that the plans are followed? Will the project continue daily until finished without interruption other than weather delays? You need to know who to call if you have a question or problem. Furthermore, does your contractor have access to the equipment needed to get the job done?
Products: Which products does the contractor use and are they the best in the industry? Be wary of contractors that offer a big discount because they will use materials left over from a previous job. While you may be interested in saving a few bucks, are you certain these materials are suitable for you project and needs? Having the project done with substandard materials that will not last never ends well for the property owner. You might have to have the system torn up and reinstalled a couple years later, costing you double down the road.
Warranty: Make sure there is some sort of a warranty with your drainage system installation once it is complete. More importantly feel confident enough with the company that they will even be in business to fulfill that warranty agreement. See if they can give you a past customer that you can call to talk to where they had a warranty issue that the contractor successfully resolved for them. Many specialized drainage companies offer a minimum of a 12-month warranty of full functionality, some contractors offer more.
Warning: We know of a family who hired a contractor that a friend's neighbor had used. Although they met with him and thought he seemed like a "good guy," they did no research on him or his business and references were not checked. After realizing that no real progress had been made in spite of the thousands of dollars they had paid him, they began to investigate. As it turns out, the friend's neighbor had had similar complaints and was dissatisfied. If the homeowners had spoken to the people for whom the contractor had worked, rather than going by their impression of his personality, they would have been spared a good chunk of change. In addition to leaving their home a complete mess, they lost all the money initially invested and had to pay someone else to finish the job. Furthermore, because they had not done their due diligence regarding the contract, they had little legal recourse. The lesson: always err on the side of caution! Do not assume that a contractor has your best interests at heart; look at their previous jobs and, if possible, consult people for whom they have worked. Most people are happy to tell you about their experiences with a business, whether good or bad, and businesses with a solid reputation are not wary of you seeing their previous work.
Copyright © 2010 Team Green Outdoor Inc. All rights reserved
Monday, May 20, 2013
British Berkefeld® Gravity Water Filter with four 7" Super SterasylTM Ceramic Water Filter Elements by Berkey
You Save : Check Price Now
Check Offer listing
We Are Thrilled to Launch Our Most recent British Berkefeld® Gravity Water Filter with four 7" Super SterasylTM Ceramic Water Filter Elements To You
Once in a while something new comes along to improve how we live our lives. At Berkey we know that the newest British Berkefeld® Gravity Water Filter with four 7" Super SterasylTM Ceramic Water Filter Elements is one of these goods. As we are positive you are already aware an item doesn't have to be completely unique just to be innovative, it merely has to offer performance that's so much improved or different than any other equivalent product available on the market. This is precisely what it requires for a product to be worthy of expending funds on.
When thinking about what we have been offering efficiently in the past couple of years, we decided there hasn't been a better period than currently to fully bring up to date the product. What we discovered is there is nothing greater than going back to inception and looking at a product to see what we might do to make it much better. what we designed is our most innovative British Berkefeld® Gravity Water Filter with four 7" Super SterasylTM Ceramic Water Filter Elements and we are very certain you'll be completely delighted with that we are supplying it at the exceptional low price.
Not only did we go back to the beginning and build the all new British Berkefeld® Gravity Water Filter with four 7" Super SterasylTM Ceramic Water Filter Elements from scratch, we've incorporated numerous options we are certain will leave its competitors seated at the starting line. Never before has anyone made available one of those items with so many extra extras at no extra cost. The product gives you the top bang for your buck that you are likely to find any place.
The versatile Big Berkey system is the ideal system for use at home with small or medium sized families, travel, outdoor activities or during unexpected emergencies.This powerful system filters both treated water and untreated raw water from such sources as remote lakes, streams, stagnant ponds and water supplies in foreign countries, where regulations may be substandard at best. Perfect for outdoor activities and a must in hostile environments where electricity, water pressure or treated water may not be available.The Big Berkey system removes pathogenic bacteria, cysts and parasites and reduces harmful chemicals such as herbicides, pesticides, and VOCs without removing the beneficial minerals your body needs.Constructed of highly polished 304 stainless steel, the system comes complete with four 7" ceramic elements. This system has a storage capacity of about 2.25 gallons (8.5 liters) and when in use it stands 19.25" in height with a diameter of 8.5". The upper chamber nests within the lower chamber for transport and stands only 13" in height.The system will filter about 25 to 30 Gallons (95-115 liters) per day.
Feature
- Big Berkey stainless steel water filter system
- (4) 7" British Berkefeld Ceramic SuperSterasyl Filters
- Holds 2.25 gallons of filtered water
- Can filter up to 30 gallons per day
- Self-sterilizing and re-cleanable filters
Sunday, May 19, 2013
Koi Pond &lifier Waterfall - Top 22 Most Requested Questions Clarified
Q What is the ideal depth for a koi pond?
A In my experience of over 25 years, 4 to 5 feet is ideal. You need a minimum of 3 feet for koi fish for several reasons. Safety for fish from wading cranes they can not wade in 3 feet of water. Plus the water temperature in shallow ponds fluctuates too much with the changes in ambient temperature. The greater the volume of water, the longer it takes for the temperature to change. Warm water or fluctuating temperatures are unhealthy for fish.
Q What is the ideal size for a pond?
A The ideal size would be determined by the size of your yard. Its size should be proportional to the size of the yard. Also, the larger the pond, the greater the maintenance.
Q What is your opinion on using a liner to construct a pond rather than using a hard molded or concrete one.
A My recommendation is and always has been to use concrete. However, if you are on a tight budget or do not plan on living there for an extended period time, a liner would be recommended. In this case, you would have to add a thin layer of mortar between the liner and soil to prevent tree roots, ground squirrels, rats, mice, gophers or chipmunks from compromising the liner. The hard molded, preformed plastic ponds become brittle from the sun's UV rays in just a couple of years. No good!
Q What type of pond filter do you recommend?
A That cannot be answered simply because many factors are involved. Do you have an existing pond with a submersible pump or above-ground pump? What's the volume of the pond? Do you have fish, and if so, how many? What size plumbing pipe is being used? This is so involved, I have devoted an entire chapter in my construction manual to the subject. I have an 8000 gallon pond with above-ground pump and I use a pressurized biological bead filter. It takes 2 minutes to back flush with the turn of a handle and keeps my pond crystal clear.
Q I have tons of algae hanging from the rocks in my falls and growing in clumps in my hand. What can I do to get rid of it?
A When the first Polynesians settled in Hawaii between 300 and 600 AD, they were probably very annoyed by the aggressive, wild, pervasive taro plant, just like you are your algae. They tried to chop it down, burn it, stomp it, but to no avail. It just came back, so they eat it, and still do to this day. In fact, it's a staple like peanut butter is to some Americans. Just kidding! However, if you told me it was watercress I would suggest eating it. Many pond stores will try to sell you a very expensive algaecide to solve your problem, but all you need to do is increase the salt content of your water. Some experts recommend one pound of rock salt to every 100 gallons of water. This will not hurt your fish; in fact, it will help to produce a healthy shine coat. However, it will harm most of your plants if you apply that dose all at once. Plus the dead and decaying algae will deplete the oxygen and this will harm your fish. Apply it slowly over a week or two, and be patient. It takes longer to kill it this way, but your fish will appreciate it! This topic is also a chapter in my construction manual.
Q Should I keep salt in my pond on a regular basis?
A If you maintain a specific gravity of 1.000, your fish will be less susceptible to ulcer and fin rot. And you will keep the algae from getting out of control.
Q I am considering building a waterfall between my house and my neighbor's against the fence. Will the sound of the falls annoy them if I let it run 24 hours a day?
A The sound generated by a waterfall is called white noise, which is very relaxing and soothing, not annoying. I have several hundred clients who leave their falls running 24/7 and none have ever had a neighbor complain. In fact, they all appreciate the fact that they did not have to spend the money to enjoy the sound.
Q How many koi fish can I put in my pond?
A The amount could range from 150 to 250 gallons per fish. If you are starting out with small 6" to 8" long koi, they can reach 2 feet in three years, depending on how much food and how often you feed them. They could even grow to over 3 feet long! The overcrowding of fish produces stress and a lot of waste material. It can reduce the health of the fish and result in various diseases. Also, a less crowded pond is more pleasant to look at.
Q Do I really need a filter in my pond?
A Not in every case. If your pond is small and you have any guppies or mosquito fish and adequate water plants covering 1/3 to ´ of your pond, your pond will clean itself by means of the nitrogen cycle. The biological aspects of pond chemistry is well covered in my waterfall and construction manual.
Q How long do koi fish live?
A The average life span of koi in Japan is 70 years. Some have been known to live to 100 or more, such as the legendary Hanako, alleged to have lived for over 200 years. Unlike the amazing results of the meticulous care the Japanese give their koi, American koi live a fraction of that time, usually due to neglect and lack of care or proper environment.
Q How can I protect my koi against predators?
A Unfortunately, most people that come to me are frustrated people who already have a pond or a rather poorly planned pond. If your pond is shallow, less than 3 feet, or has a shallow end, the raccoons, coyotes, cranes, egrets, etc. have easy access to your fish. You may think your fish are safe because you have a deep end for the fish to retreat to. Well, you and your fish are dead wrong. A crane will stand perfectly still for 10 to 20 minutes waiting for the koi to forget he is there. Some will regurgitate chum into the deep pond, luring the fish to the surface. Your only solution is a net, or try the crane statue, scarecrow, or high-frequency sound emitters for smaller animals. However, one of my clients watched a crane land next to his crane statue. While the scarecrow was pelting him with a stream of water, it snatched up one of their prize koi.
A critter-proof pond is over 3 feet everywhere and has a raised deck 13" minimum over the water surrounding the pond. Raccoons cannot swim and catch fish at the same time, and they or the birds will not be able to reach the water.
Q I would like to have a koi pond but I live in Michigan and every year ponds and lakes freeze over. Will they survive?
A There are fish in those lakes you are talking about: blue gill, bass, sunfish, carp, and they all survive. And guess what? Koi are in the carp family. Koi were originally raised for food in Japan. They would grow rice in the summer and then flood the rice patties and raise koi in the winter, cutting holes in the ice to catch them for food. However, your pond must be 4 ´ to 6 feet deep to ensure the water stays about 40 o the bottom. Turn off the waterfall and bottom drain, draw water from the skimmer to keep the bottom still. Place swimming pool solar blankets over the surface. If your pond is deep enough, you can let it freeze over. However, you need to install a horse tank heater to keep a hole open in the ice to allow any ammonia gas from rotting debris on the bottom to escape. If your pond is less than 4 ´ feet deep, take the koi indoors for the winter and place them in a garage or basement tank.
Q Can I keep koi and goldfish together?
A Yes, you can. They are both cold water fish and members of the carp family. Most other cold water fish can also swim together, such as shubunkins, rudd, orfe, blue gill, mosquito fish, guppies, sunfish, bass, etc. However, only in deeper ponds where the mean temperature is 65 degrees or less on the bottom for bass, sunfish and blue gill.
Q Should my pond have a bottom drain?
A First of all, a bottom drain is essential for a healthy pond. However, if it is exposed and the suction is strong enough, turtles or fish can get stuck to it and not be able to get loose. Therefore, two drains should be hooked in series to relieve the pressure between them, just as in a swimming pool. Bottom drains draw falling waste from the fish before it reaches the bottom, keeping it clean. Areas where it does build up can be swept to the drains for easy cleaning. If you are using a submersible pump or pulling the water from a skimmer, water is not circulating properly on the bottom of the pond. That is where rotting debris is producing ammonia and other toxic gases.
Q My pond water is very clear, but my fish are dying. What is wrong?
A Drinking water might taste good, smell good, and look clear. But some of the most toxic chemicals that are known to cause cancer are colorless, odorless and tasteless. I recommend that you purchase a test kit form a pond store and check your water regularly. Nitrates, nitrite and ammonia are all detrimental to fish. Ammonia and nitrite can, at high levels, be fatal to fish. These substances are dissolved in the water and consequently are impossible to detect by the clarity of the water and they can break down the fishes' immune system.
Q What type of filter do you recommend?
A For any pond over 1000 gallons, I recommend a pressurized biological bead filter that can be back washed. I have used Aqua Ultraviolet Ultima II filters for years. Most larger pond suppliers carry them. Their filters range from 1000 gallons to 10,000 gallons. Up-flow and gravity flow filters require regular cleaning, which is a filthy job. The filter media is packed with stinky, putrid fish waste and decaying pond scum. As you handle the filter screens, media, scrubbers, etc., you will have little white feces-eating worms that are 1/16" long crawling on your hands and arms. Not to mention the noxious smell that burns your eyes and lungs.
It cost pennies on the dollar to make, yet dealers charge a fortune. You pay the price for the filter and in the time it takes to maintain it you pay an additional cost for your time maintaining it. With a pressurized filter, it only takes the turn of a handle for 2 to 3 minutes and the filter is clean. The waste water is not wasted either. You can water your plants with it using the discharge hose. If you can imagine, that brown, colored, stinky water is packed with nitrogen. It's better than Miracle Grow T.M. I have used my 6000 gallon Ultima II for over eight years and it works as well now as they day it was installed. Happy, happy fish!
Q How much does an average pond cost?
A What is average? It depends on whether you are talking about a liner pond or a professional concrete and rebar pond. A typical liner pond can be 6 feet by 8 feet, and depending on who is installing it, could cost between ,500 and ,500. The other dimensions are pretty much proportionate. Liner ponds are susceptible to leaks from punctures, gophers, and rats, etc. Concrete ponds last for decades and on the average cost only 20% more than liner ponds.
Q My pond is green and I can not see my fish. What should I do?
A Your challenge is algae (suspended planktonic algae), which does not directly hurt the fish. However, algae gives off oxygen during the day from photosynthesis. But unfortunately, it uses up oxygen at night. In addition, it is unsightly and blocks the view of the fish. You can increase the salt content or install an ultraviolet light, which not only kills spore algae but kills the bacteria that causes the water to become murky and stinky.
Q I heard that UV light will also kill the beneficial bacteria. Is that true?
A If I say "No," I am calling many so-called professional experts liars. So I will put it this way. All the beneficial pond bacteria such as aerobic or anaerobic bacteria, nitrobacter, etc., reside in the filter or in the decaying debris at the bottom of the pond. They aren't floating around in the pond. Bacteria and algae containing pathogenic disease are, and as they pass through the UV light, they are eradicated.
Q Do I need a waterfall for my pond?
A With no hesitation, YES! Most definitely. First of all, waterfalls are beautiful to look at. The sound is soothing and relaxing and the water moving over rocks generates negative ions which are added to the air. As you breathe negatively charged air, it relieves stress and anxiety. Waterfalls also add extra oxygen to the pond. Waterfalls are a must!
Q I heard concrete ponds will leach alkali into the pond. Is that true?
A Yes and no. A poorly constructed concrete pond will, but only until algae starts growing on the sides. Also if the pond is constructed of 3500 psi concrete and coated with Thoro-seal., it is impossible for alkali to leach out. Also, by mixing thinset with the mortar used between the rocks will also prevent leaching. There is a specific formula for this.
Q What is the advantage of building a waterfall using concrete and mortar?
A A major reason is that the rock will be securely mortared in place, preventing a serious accident from rocks sliding, as with a liner waterfall. Trust me, some day, some adventurous child will climb onto it. That is a lawsuit in the making.
Happy koi, peace & joy.
Friday, May 17, 2013
Wine-making Instructions - Make it simple
Wine is an excellent drink. It's a deep mixture of tastes and aromas, also it requires a certain type of person to understand these additionally to the energy put in your wine making process.
Wines are no more the province of snobby and snooty individuals who originate from old moneyed families though. The brand new trend is home wine-making: people make small batches of wine in your own home.
Home wine-makers are grateful for wine with no pretentiousness from the traditional wine makers. That like to talk about wine-making instructions and every other peoples wines, like getting a collective wine cellar.
If you wish to make wine in your own home, the easiest method to start would be to request somebody that has already been doing the work. You will find niche supply stores that offer the gear and elements to make wine in your own home.
Frequently, forms of meeting places for fanatics within the area, so they are great places for obtaining information and wine-making instructions too.
It might be best to begin with a prepackaged package unless of course one happens to understand someone with roots deep within the wine business plus they agree that will help you.
These packages can are the very fundamental towards the advanced. If this sounds like the first time, it's suggested your choice the most cost effective package. These kits may have all you need to help make your first home wine.
The gear is mainly tanks and hoses, nothing too fancy or complicated. Indeed, the wine making process is simple the complexness occurs when you attempt to attain particular qualities by manipulating the many factors.
The newbie packages will even usually include wine-making instructions, so not fret an excessive amount of. They are common instructions for any 4-week wine package.
Begin with sanitizing your aging tank, often a 27-liter tank. To get this done, you'll need some kind of sanitizing powder mix like sodium metabisulphite, that will usually be incorporated within the package.
After cleaning it, it's time to begin to make your wine itself. Keep the excitement under control though you will have to give consideration with a minute particulars.
Pour the syrup packet in to the fermenter and then try to get every tiny bit, adding just a little warm water into it. Then start filling it with water, until just beneath the 23 liter mark. You should use plain tap water, but using sterilized water usually creates a better wine. Stir it intensely to aerate it, the yeast need this.
Go ahead and take water temperature it ought to be between 20 and thirty levels Celsius. Add cold or warm water when needed until you're able to 23 liters. Add some yeast, but don't stir the mix. Seal the lid and add an airlock, half-filling it with water.
Keep the temperature constant for around a couple of days. Once the air lock begins bubbling, you realize you have carried out it right. After that you can move it to some cooler 18-20 levels Celsius.
On day 6, neat and sanitize a carboy. Siphon the fermented liquid in it, and add water before you reach 3 inches in the top. Again, attach the airlock half-full of water. Let it rest inside a dark awesome place. On around day 20, make use of your hygrometer to check on for alcohol content.
Read your kit's wine-making instructions and add any extra elements as specified. A particular gravity of .990 to at least one.000 is nice. If it doesn't emerge like this, let it rest for a few days and appearance again. After meeting the needed specific gravity, siphon the liquid in to the bucket. Attempt to minimize the quantity of sediment at the end from the carboy that will get in to the bucket. Add any packets as instructed from your package. Stir for any couple of minutes to produce co2.
Co2 gives wine a clear, crisp taste and cloudiness. Neat and sanitize your carboy, and siphon the liquid in. For 2 days next shake it 3 or four occasions each day to make certain just as much co2 is eliminated.
Around the 28th day, your wines are almost ready for bottling or consuming. Dissolve two Campden pills inside a half-glass water and combine it with your wine. Watch for two more times of standing.
Next, really the only factor left to complete would be to remove the sediment and bottle up. Most 4-week wines taste best after aging for six several weeks, however they might be loved immediately. Fundamental essentials fundamental home wine-making instructions.
Thursday, May 16, 2013
My Outside Philosophy.wmv file
Wednesday, May 15, 2013
Water That Is Clean
Monday, May 13, 2013
Coleman Brought Quad Lantern - SuRRvival Gear with Richard Ryan
Saturday, May 11, 2013
Thursday, May 9, 2013
Snowmelt water recovery system dual purpose brewing equipment
Wednesday, May 8, 2013
2 Black Berkey Replacement Water Filters - Big Berkey from Black Berkey
You might be thrilled by the 2 Black Berkey Replacement Water Filters - Big Berkey, new item from Black Berkey which out inside the market now. Our no limits capture and try to utilize some distinct technology to really make it real for every person. Some of the analysis that we put in this item came from the client relative knowledge and also the length information. That is a compelling item that make Black Berkey is far more success and nicely know inside the market about the globe.

You Save : Check Lower Price
Check Offer listing
This new item idea that we try to came across to make a wonderful item for client about the globe came from our client information and wonderful inclusion modern information. 2 Black Berkey Replacement Water Filters - Big Berkey is going to be in every loved ones that trying to find a far better lifestyle. In every process away in the intelligent manufacturing and intensive product's top quality control lead us on the confident that we'll have the ability to give our client the right answer that they have been trying to find. Simultaneously as deciding on household development and private item is particularly essential for you. We've created our productive the 2 Black Berkey Replacement Water Filters - Big Berkey from our extensive situations knowledge inside the firm.
From this moment on you can really uncover That is undoubtedly not too difficult for you and your loved ones to have a essentially comfy life style and take pleasure in your time by spending tiny of the spending spending budget.
Click here for more on the 2 Black Berkey Replacement Water Filters - Big Berkey full review
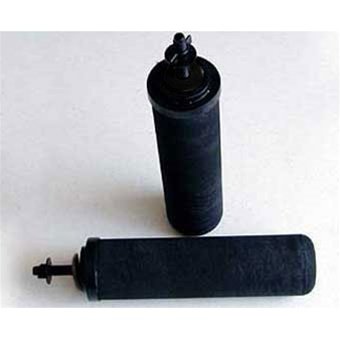
Set of 2 replacement filters. Will fit the following Berkey systems: Travel Berkey, Big Berkey, Royal Berkey, Imperial Berkey, Crown Berkey, Berkey Light. Black Berkey Purification Elements are more powerful than any other gravity filter element currently available. In fact, we tested the Black Berkey purification elements with more than 10,000 times the concentration of pathogens per liter than is required by standard test protocol. This concentration of pathogens is so great that the post filtered water should be expected to contain 100,000 or more pathogens per liter (99.99% reduction - the requirement for pathogenic removal). Incredibly the purification elements removed 100%. Absolutely no pathogens were cultured from the effluent or were able to be detected, even under an electron microscope, setting a new standard in water purification.Black Berkey purification elements are so powerful, they can remove red food coloring from water without removing the beneficial minerals your body needs. Virtually no other filtration element can duplicate this performance.The powerful Black Berkey purification elements also remove or reduce viruses, pathogenic cysts, parasites, harmful or unwanted chemicals such as herbicides and pesticides, VOCs, detergents, organic solvents, trihalomethanes, cloudiness, silt, sediment, nitrates, nitrites, heavy metals, foul tastes and odors, yet they leave in the healthful and beneficial minerals that your body needs.
Feature
- 2 Black Berkeys good for 6000 Gallons
- Recleanable and Self-Sterilizing
Monday, May 6, 2013
DIY homemade bucket filter.......Add some batting
Sunday, May 5, 2013
How You Can Stop Water From Seeping Out Of Your Ac
Scenario:
My ac is just a years old and it is seeping water badly. It is a window mounted ac and I am afraid the seeping water will damage my exterior walls. Do everyone have ideas or tips?
Solution:
It may sound much like your drain lines are clogged. That is what enables your AC to empty from the water. This can be a repair that you ought to have the ability to do yourself. A drain line ought to be washed yearly. Most drain lines flow with the aid of gravity, delivering the condensation that collects within the pan. It overflows consequently to become blocked before you possess a seeping ac. Like I stated, regular maintenance is essential to help keep it free flowing.
As you have a window ac it's most likely piped in the outdoors which situation you need to locate the drain line and flush it completely. You could utilize an outdoor hose if you are careful or you might also flush it with air.
In case your air conditioner utilizes a condensation pump instead of gravity feed than it should take to become changed. Within this situation water is piped in the unit towards the pump where it fills before the float reaches the right level. Once you switch it on determine whether it might be not running while it's full. When the pump isn't operating you may have the ability to change it yourself or you might want to call and ac specialist. Remember, before you decide to attempt any mending make sure to unplug the ac.
Once you have it fixed make sure to fix it yearly to help keep algae and grime eventually get to the absolute minimum.
Saturday, May 4, 2013
An Entire Help guide to Marine Seafood Keeping
Marine Aquarium System
INTRODUCTION
Setting up aquariums at home as a piece of decoration has been a very common practice. This, not only enhances the beauty of our room, but adds life to our room also. If you think more in depth, this small piece of decoration can be categorized into a number of types depending on the differences in set-up and constitution. A 'Marine Aquarium' is a type which has to be decorated with marine plants and animals. This again can be further subdivided into the following types;
o Fish Only (FO)
o Fish Only with Live Rock (FOWLR) and
o Reef Aquaria
Marine fish keeping is entirely different from the other types as this involves more knowledge and study. An extensive knowledge is required regarding the composition of water, its chemical properties and the adaptability of the inhabitants of a marine aquarium.
To start with, let us first discuss the very first step of installing a 'Marine Aquarium System' which includes the major components that are essential for a marine aquarium.
Major Components of a Marine Aquarium
The very first thing required for the installation of a Marine Aquarium is a sound knowledge of all the major components of it. The usual volume range of Marine Aquariums is from less than 80 litres to over 1200 litres. The major components of a Marine Aquarium are;
o An Aquarium, made of glass or acrylic
o Filtration Equipment
o Proper Lighting
o Aquarium Heater and Refrigeration Devices
The material of the aquarium should be preferably made of glass or acrylic. Glass is used mainly because of its holding strength, transparency and inexpensive too. Also, glass has a remarkable feature of distributing the total pressure within the whole aquarium. However, acrylic can also be used as an alternative to glass as it is light weight and can be moulded very easily to give varied shapes and sizes. In addition, it is scratch resistant and provides a much better electric insulation, although its price is a bit higher.
The filtration set up of a marine aquarium is much more complex compared to other freshwater aquariums and includes physical, chemical and biological filtration as well. The most commonly used filtration equipments are; Wet and Dry Filters and Protein Skimmers. A Protein Skimmer is a device which is used to remove organic compounds from the water before they are further broken into nitrogenous wastes. Protein skimming is an important process of filtration as this is the only method of filtration where the organic compounds are removed physically before they are decomposed - thus improving the water property. Some of the marine aquariums also contain a Refugium or a Sump. A refugium is a small container, or more likely a small aquarium which is laid beneath the marine aquarium and is connected to it by a water pump. A sump however contains a number of chambers, each of which is filled with its own filtration material.
Lights play a major role in marine aquariums, so proper lighting is very much essential in this case. Although, it is advised to set a cyclical lighting arrangement in order to stimulate the day and night, but it varies depending on the type of inhabitants of the aquarium. For a typical 'Fish Only' type, intense light is not required. But in case of aquariums containing invertebrates, an intense light is preferred. The most commonly used lights are; Fluorescent, VHO Fluorescent with very high intensity, Compact Fluorescent, LED and Metal Halide. Although there are a lot of variations regarding this sources of light, but all this technologies have its own advantages and disadvantages. The two most important factors that should be taken into consideration while selecting a lighting arrangement are; wattage and color temperature. The wattage of the lights may vary from tens to several hundreds, depending on the type of lighting used. Color temperature, on the other hand, is nothing but the color of light emitted by the lighting system. Color temperature >5000K has proved to be best for growing plants in marine aquariums. A 10,000K lighting system throws a bluish-white radiation which affects the colours in fishes and corals. A much higher spectrum, say 14,000K and 20,000K produces a deep blue radiation, like that of under the sea and creates a similar environment.
A Marine Aquarium temperature should be maintained at 24 to 28 degrees Celsius, which is similar to the natural environment of the marine inhabitants. In cases, where the aquarium temperature is less than this desired temperature, an 'Aquarium Heater' is used. On the other hand, if the temperature is greater than desired, a refrigeration device known as 'Chillers' is used to lower down the aquarium temperature.
Set-up the Marine Aquarium - 1st Part
Once you are ready with all the essential components of a Marine Fish Tank, the second major step is the setting up process. It is a lengthy process and might take 4 to 8 weeks before you can actually add any marine life into the set-up. The major steps included in the set-up process are;
o Deciding the aquarium size and location
o Arranging the essential aquarium equipments
o Setting up the aquarium with all the equipments
o Adding previously mixed saltwater to the aquarium
o Curing of live rock
o Adding the substrate
o Monitoring the water thoroughly and allow the tank to cycle.
o Adding marine fishes.
So let's discuss all the major points by step.
Aquarium size and location: The size of the aquarium varies with the type of marine fish you would like to keep. This is because the size and growth of marine fishes varies from an inch to about 12 or 18 inches. It is always better to avoid smaller tanks as this requires frequent water testing and greater maintenance. A perfect place to set up your marine system is in that area where the external sources such as windows or heater vent hardly affects the light and temperature of the aquarium. Last but not the least, the stand should be strong enough to hold the total weight of the aquarium.
Essential aquarium equipments: It is advisable to list down and arrange all the essential equipments required for setting up a marine aquarium before the set-up process so that you do not miss out a single. The first thing you need to decide is the type of filtration. A combination of live rock as a biological filter and protein skimmer as a method for mechanical and chemical filtration is perfect in this case. Arrange the live rock, sand and a power strip. Live sand or aragonite based sand, especially from caribsea is the best choice. You can also use crushed coral as a best choice, but avoid using sandbox or playground sand as these are harmful for your marine life.
Set up your aquarium: Avoid using soap or detergents to wash the tank as the soap residues prove to be harmful for marine fishes. Wash it up with water only and fill it up with fresh water for smoke and leakage testing, if any. Drain out the water once the test is done and the next step is to fix a background. It is advisable to paint the background as there are no chances of salt creep getting in between the background and glass. The painting should be done at the outside wall of the backside and not in the inside wall. A black background is ideal for marine tanks as this enhances the color of the fishes. Alternatively, you can also use deep blue as this helps in creating an illusion of water depth. After the tank has been left for a day in order to allow the paint to dry off, install the heater, filter and protein skimmer. Do not forget to use a drip loop on all the power cords and check back the aquarium electrical paths.
Set-up the Marine Aquarium - 2nd Part
Add pre-mixed saltwater: You can use most of the commonly available mixtures, unless you are setting a reef tank. Take a 5 gallon bucket, fill it up and remove the chlorine and chloramine using suitable additives and medicines for Aquariums.. Then slowly add the salt mixture to the water at room temperature with constant stirring. Once you are sure that the whole salt mixture has dissolved completely, test it with a hydrometer or refractometer. Once the specific gravity reaches between 1.021 and 1.024, the water is ready to be added into your aquarium. Make sure to allow the water to circulate for about a day or two by turning the aquarium on.
Curing the live rock: Though quite expensive, but live rock falls under the essential part of Marine Aquarium. This is only because live rock is considered to be the best form of biological filtration. Depending on the shape of the rock, the period of curing may extend from 1 week to 2 months even. After draining some water out of the aquarium, place the live rock in the middle of it with the powerheads aiming at the rocks. You need to brush the rocks every after few days regularly, but do not forget to turn off the power in the tank. You may use new rubber kitchen gloves or brush with plastic bristles to scrub and remove the dead organisms in the rock. Now siphon the disposals and fill the tank with previously mixed saltwater. Do not forget to put a powerhead and a heater in the mixing container in order to mix uniformly and keep on testing regularly to ensure that the tank is cycling. One smarter way to understand that the live rock is cured is that when the tank stops smelling bad. The tank water should be free from ammonia and nitrite, so do not miss out to test it at regular intervals.
Adding substrate: once the curing process of live rock is completed, you need to prepare your aquarium for the substrate layer. For that, first of all drain out some water to make a space for the sand and then turn off the aquarium power. Take a large bucket, say about 5 gallon and pre-mix in it about 2 gallons of saltwater. Add the sand in the pre-mixed saltwater and keep on stirring. By constant stirring, the dust and unwanted particles will rise up which you must drain out carefully. Also drain out some saltwater from the mixing bucket and then with the help of a ladle or something like that add the clean sand to the aquarium slowly. You might use a powerhead for blowing off, if any sand particles get into the live rock. So, finally the marine tank set-up process seems to have come to an end. Now at this stage, the only thing that is advised is to allow the tank to settle down. For another few days, keep on monitoring the water parameters without disturbing the tank much.
Set-up the Marine Aquarium - 3rd Part
Monitoring the tank: Once the aquarium is ready with all the essential components, it needs a standing time of few days to settle down. During this phase your most important task is to constantly monitor all the delicate parameters so as to ensure a perfect environment for the marine fishes. The monitoring includes;
o Checking the temperature of the aquarium water
o Checking the specific gravity of the aquarium water
o Checking the pH balance of the aquarium water
o Checking the ammonia level
o Checking the nitrite level
o Checking the nitrate level of the aquarium water
o Checking the carbonate hardness level of the aquarium water
All the above parameters should be perfectly within the desired range. A little disbalance in any of these above parameters can be a threat to marine life. So, it is advised to perform this monitoring process very carefully. Any imbalance if noted, must be rectified and brought to normal level before the addition of marine fishes.
The temperature range of the aquarium should be between 75°F - 80°F (24°C - 27°C) and the specific gravity should range from 1.020 to 1.024. Moreover, the pH reading of the aquarium water should be between 8.0 to 8.4. Note that the levels of ammonia and nitrite content in the aquarium water should be 0. In other words, there must not be any trace of ammonia and nitrite in the aquarium water. However, the nitrate content of the water should be around 20ppm or less, especially for the invertebrates whereas, the carbonate hardness range is 7 - 10dKH. The water we use daily is generally rich in phosphates, which must be taken care of. Presence of phosphate in the aquarium water increases the chances of some of the undesirable algae growth. While even a small amount of copper in the aquarium could be a threat to snails, shrimps, starfishes and other invertebrates - though not harmful for fishes. One of the most important points to enhance water quality is to keep it in motion. A moving water is perfect for gaseous exchange so that it remains oxygenated and as a result good for the health of the fishes. The best way to keep the aquarium water in motion is by using a powerhead. Also, the pumps play an important role in driving out excess of carbon dioxide from the water, which may result in low pH otherwise. It is advised to keep the levels of salt, calcium, alkalinity and temperature stable. Allow a standing time to the aquarium water so that the water chemistry comes to a stabilized state which is very important.
A quick highlight of the water chemistry:
- Temperature Range: 75°F - 80°F (24°C - 27°C)
- Specific Gravity Range: 1.020 to 1.024
- pH Range: 8.0 to 8.4
- Ammonia Level: 0
- Nitrite Level: 0
- Phosphate Level: 0
- Copper Level: 0
- Nitrate Range: 20ppm or less, especially for the invertebrates
- Carbonate Hardness Range: 7 - 10dKH
Set-up the Marine Aquarium - 4th Part
Adding Marine Fishes: Once the water chemistry comes to a stabilized state and the tank is totally cycled and ready, it is the perfect environment to add marine life into your Marine Aquarium System. Marine species not only includes marine fishes, but also anemones and other marine invertebrates. Maintaining saltwater fishes involves a lot of behavioral understanding, additional skill sets and knowledge. This is because the marine fishes in general are physiologically different and are less adaptable compared to the freshwater species. All you need is a stable environment and some special treatments and conditions - no other extra pampering is actually required to maintain the fishes. Compared to freshwater aquariums, a saltwater or marine aquarium supports a wider range of extraordinarily beautiful fishes. Some of the most popular saltwater fishes are Damsels, Lionfish, Clownfish, Triggerfish, Blennies, Butterfly fish and marine Angelfish. Among a wide range of marine fishes certain species like Clownfish, Wrasses, Anthias and Marine Betta throws a vibrant color to your aquarium. Once your marine aquarium system is ready, it is advisable to start with the popular sturdier marine fishes and Damsels are perfect for such cases. Damsels, unlike other popular marine species are much more sturdy and also less expensive compared to others.
However, one thing that should be kept in mind is that Damsels are a bit aggressive in their nature and so are not friendly with many of the other marine species. For another six months keep your marine aquarium on some of the few hardy marine fishes and do not miss out to keep a close eye on the conditions of the aquarium water. If everything goes well and well balanced, after approximately six months or so, try adding some of the hardy invertebrates. Among the hardy invertebrates, you can start with adding of soft corals, algae's, shrimps, anemones, starfish and urchins. You can also fill your marine aquarium with some of the other popular creatures like worms and sponges. After the successful addition and maintenance of these invertebrates and after about one to two years, you can start considering the comparatively sensitive invertebrates such as stony corals, clams etc. In an advance stage, you can even house your marine aquarium with somewhat larger invertebrates such as jellyfish and octopus. So by now, you could well guess that a marine aquarium is capable of housing a much wider range of creatures than you could actually imagine in case of freshwater aquarium.
Last but not the least, a healthy and spacious environment is required for the healthy growth of the marine fishes. In order to provide a healthy environment, never ever overstock your aquarium, which is a very common practice among beginners. Another very common mistake that should be avoided is overfeeding of the fishes that may lead to poor quality of water and even sickness leading to death of your aquarium fishes. It is always advisable to feed your marine fishes in small amounts so that it all gets eaten up, thus preventing the water from getting poor. Keeping aside all the technical points, one major job should be to check your aquarium fishes and invertebrates - their health and movement. Any signs of illness if noted, it is advised to check your water conditions, look for the symptoms of the disease and then consult your marine aquarium retailer or Internet books for advice.
Subscribe to:
Comments (Atom)